[av_heading heading=’Anleitung zur Einrichtung Ihres eMailers‘ tag=’h1′ link_apply=“ link=“ link_target=“ style=’blockquote modern-quote‘ size=“ subheading_active=’subheading_above‘ subheading_size=’15‘ margin=“ padding=’10‘ color=“ custom_font=“ custom_class=“ admin_preview_bg=“ av-desktop-hide=“ av-medium-hide=“ av-small-hide=“ av-mini-hide=“ av-medium-font-size-title=“ av-small-font-size-title=“ av-mini-font-size-title=“ av-medium-font-size=“ av-small-font-size=“ av-mini-font-size=“]
POP3, IMAP und SMTP mit Verschlüsselung der Zugangsdatenübertragung per SSL und TLS
[/av_heading]
[av_image src=’https://netztaucher.com/wp-content/uploads/2015/11/email.jpg‘ attachment=’12219′ attachment_size=’full‘ align=’center‘ styling=“ hover=’av-hover-grow‘ link=“ target=“ caption=’yes‘ font_size=’40‘ appearance=’on-hover‘ overlay_opacity=’0.4′ overlay_color=’#000000′ overlay_text_color=’#ffffff‘ copyright=“ animation=’no-animation‘ av_uid=’av-gsbztgi‘ admin_preview_bg=“]
Anleitung zur Einrichtung Ihres eMailers
[/av_image]
[av_hr class=’default‘ height=’50‘ shadow=’no-shadow‘ position=’center‘ custom_border=’av-border-thin‘ custom_width=’50px‘ custom_border_color=“ custom_margin_top=’30px‘ custom_margin_bottom=’30px‘ icon_select=’yes‘ custom_icon_color=“ icon=’ue808′ av_uid=’av-1mkepuq‘]
[av_textblock size=“ font_color=“ color=“ av-medium-font-size=“ av-small-font-size=“ av-mini-font-size=“ av_uid=’av-lork8jm‘ admin_preview_bg=“]
Sie sollten Ihren Mailaccount per IMAP betreiben. So ist sichergestellt, dass Sie auf jedem benutzen Gerät alle Mails zur Verfügung haben, im Eingang, im Ausgang und allen anderen Ordnern. Sie haben auf dem Mailserver immer eine Kopie der Mail liegen.
Wenn Sie Ihren Computer wechseln, müssen Sie nur Ihre Zugangsdaten eingeben und Ihr Postfach ist so eingerichtet, wie Sie es gewohnt sind. Weiterhin sollten Sie den Verbindungsaufbau per SSL und /oder TLS verschlüsseln. Keine Angst – hier zeige ich wie einfach das ist.
[/av_textblock]
[av_hr class=’default‘ height=’50‘ shadow=’no-shadow‘ position=’center‘ custom_border=’av-border-thin‘ custom_width=’50px‘ custom_border_color=“ custom_margin_top=’30px‘ custom_margin_bottom=’30px‘ icon_select=’yes‘ custom_icon_color=“ icon=’ue808′ av_uid=’av-24uw076′]
[av_textblock size=“ font_color=“ color=“ av-medium-font-size=“ av-small-font-size=“ av-mini-font-size=“ av_uid=’av-l4kde9u‘ admin_preview_bg=“]
Zugangsdaten im Plesk ablesen
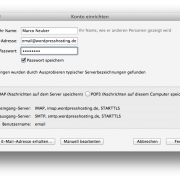
Loggen Sie sich in das Plesk ein und lesen die Zugangsdaten ab.
[/av_textblock]
[av_gallery ids=’26772,26771,26770′ style=’thumbnails‘ preview_size=’portfolio‘ crop_big_preview_thumbnail=’avia-gallery-big-crop-thumb‘ thumb_size=’no scaling‘ columns=’3′ imagelink=’lightbox‘ lazyload=’avia_lazyload‘ av_uid=’av-jth5zxmn‘ admin_preview_bg=“]
[av_hr class=’default‘ height=’50‘ shadow=’no-shadow‘ position=’center‘ custom_border=’av-border-thin‘ custom_width=’50px‘ custom_border_color=“ custom_margin_top=’30px‘ custom_margin_bottom=’30px‘ icon_select=’yes‘ custom_icon_color=“ icon=’ue808′ av_uid=’av-24uw076′]
[av_textblock size=“ font_color=“ color=“ av_uid=’av-l4kde9u‘]
Die Sache mit dem Servernamen
Nur wenn Sie den korrekten Servernamen eintragen, verwenden Sie SSL korrekt und es gibt keine Zertifikatsfehler im Mailprogramm. Den Namen haben Sie mit Ihren Zugangsdaten erhalten. Es ist immer ein Bewohner Springfields.
[av_table purpose=’tabular‘ caption=“ responsive_styling=’avia_responsive_table‘ av_uid=’av-khlmvnm‘]
[av_row row_style=’avia-heading-row‘ av_uid=’av-k1xkt4y‘][av_cell col_style=“ av_uid=’av-jl9k5oi‘]Protokoll[/av_cell][av_cell col_style=’avia-highlight-col‘ av_uid=’av-iwp0g82′]Servername[/av_cell][av_cell col_style=“ av_uid=’av-imyc4wy‘]Portnummer[/av_cell][/av_row]
[av_row row_style=“ av_uid=’av-i7pp6yq‘][av_cell col_style=“ av_uid=’av-hjwlkhu‘]IMAP[/av_cell][av_cell col_style=’avia-highlight-col‘ av_uid=’av-h2zl9sy‘]servername.kundenserver42.de[/av_cell][av_cell col_style=“ av_uid=’av-gn0ktr6′]Port 993[/av_cell][/av_row]
[av_row row_style=“ av_uid=’av-ggzom2q‘][av_cell col_style=“ av_uid=’av-fwrnrk2′]SMTP[/av_cell][av_cell col_style=’avia-highlight-col‘ av_uid=’av-fc4msle‘]servername.kundenserver42.de[/av_cell][av_cell col_style=“ av_uid=’av-eyy014y‘]Port 465[/av_cell][/av_row]
[av_row row_style=“ av_uid=’av-ef3fkw2′][av_cell col_style=“ av_uid=’av-dtwiqbm‘]POP3[/av_cell][av_cell col_style=’avia-highlight-col‘ av_uid=’av-dfn6sjm‘]servername.kundenserver42.de[/av_cell][av_cell col_style=“ av_uid=’av-d3crkwy‘]Port 995[/av_cell][/av_row]
[/av_table]
[/av_textblock]
[av_hr class=’default‘ height=’50‘ shadow=’no-shadow‘ position=’center‘ custom_border=’av-border-thin‘ custom_width=’50px‘ custom_border_color=“ custom_margin_top=’30px‘ custom_margin_bottom=’30px‘ icon_select=’yes‘ custom_icon_color=“ icon=’ue808′ av_uid=’av-191xaqq‘]
[av_one_third first av_uid=’av-c4r6m82′]
[av_image src=’https://netztaucher.com/wp-content/uploads/2015/01/thunderbird-einrichten-300×300.jpg‘ attachment=’10983′ attachment_size=’medium‘ align=’center‘ animation=’no-animation‘ link=“ target=“ styling=“ caption=“ font_size=“ appearance=“ av_uid=’av-bp309du‘][/av_image]
[/av_one_third]
[av_two_third min_height=“ vertical_alignment=“ space=“ custom_margin=“ margin=’0px‘ padding=’0px‘ border=“ border_color=“ radius=’0px‘ background_color=“ src=“ background_position=’top left‘ background_repeat=’no-repeat‘ av_uid=’av-b486iea‘]
[av_textblock size=“ font_color=“ color=“ av_uid=’av-axi1io2′]
Mozilla Thunderbird
Zur Einrichtung Ihres Mailaccounts benötigen Sie vier Dinge
- Benutzername
- Passwort
- Namen des Mailservers
- Signaturtext
Daten zur Hand? Dann kann es losgehen.
[/av_textblock]
[/av_two_third]
[av_content_slider heading=“ columns=’1′ animation=’slide‘ navigation=’arrows‘ autoplay=’true‘ interval=’5′ font_color=“ color=“ av_uid=’av-acol2de‘]
[av_content_slide title=’Thunderbird starten und die eMail-Adresse eingeben‘ link=“ linktarget=“ av_uid=’av-9x1haf6′]
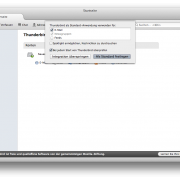
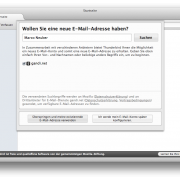
Thunderbird öffnen, sie werden direkt gefragt wie es weitergehen soll. Wählen Sie unten links meine existierende eMail verwenden. Falls der Hinweis fehlt, geben Sie rechts oben über das Menü mit den 3 waagerechten Strichen und wählen Einstellungen, Konten-Einstellungen.
[/av_content_slide]
[av_content_slide title=’Abfrage der Zugangsdaten und Namen des Mailservers‘ link=“ linktarget=“ av_uid=’av-9bo73oi‘]
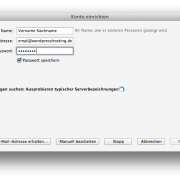
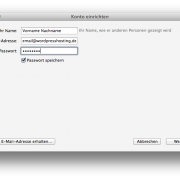
eMail-Adresse und Passwort eingeben, auf manuell bearbeiten klicken
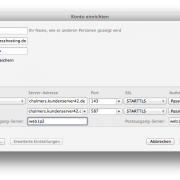
1. Zeile: IMAP auswählen, Mailserver eingeben, STRTTLS wählen
2. Zeile: SMTP auswählen, Mailserver eingeben, STRTTLS wählen
3. Zeile: Benutzername für Posteingaen und Postausgang eintragen
fertig klicken
[/av_content_slide]
[av_content_slide title=’Rechtssicherheit: Einstellungen für die Signatur‘ link=“ linktarget=“ av_uid=’av-8u5xmoy‘]
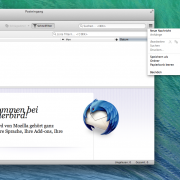
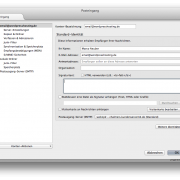
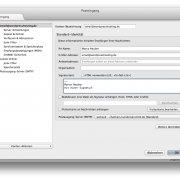
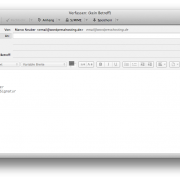
Das eMail-Programm funktioniert. Jetzt muss noch die rechtlich korrekte Signatur eingerichtet werden. Oben rechts in die Einstellungen » Konteneinstellungen gehen. Links den Account wählen » unter Signaturtext die Signatur einkopieren. Bei jeder neuen Mail sind alle Informationen direkt Ihrer eMail angehangen.
[/av_content_slide]
[/av_content_slider]
[av_hr class=’default‘ height=’50‘ shadow=’no-shadow‘ position=’center‘ custom_border=’av-border-thin‘ custom_width=’50px‘ custom_border_color=“ custom_margin_top=’30px‘ custom_margin_bottom=’30px‘ icon_select=’yes‘ custom_icon_color=“ icon=’ue808′ av_uid=’av-8nnh4o2′]
[av_one_third first av_uid=’av-82kulnm‘]
[av_image src=’https://netztaucher.com/wp-content/uploads/2015/01/outlook-einrichten-180×180.jpg‘ attachment=’11024′ attachment_size=’square‘ align=’center‘ animation=’no-animation‘ link=“ target=“ styling=“ caption=“ font_size=“ appearance=“ av_uid=’av-7gwm1du‘][/av_image]
[/av_one_third]
[av_two_third min_height=“ vertical_alignment=“ space=“ custom_margin=“ margin=’0px‘ padding=’0px‘ border=“ border_color=“ radius=’0px‘ background_color=“ src=“ background_position=’top left‘ background_repeat=’no-repeat‘ av_uid=’av-711j1xe‘]
[av_textblock size=“ font_color=“ color=“ av_uid=’av-6v0t9qa‘]
Microsoft Outlook
Zur Einrichtung Ihres Mailaccounts benötigen Sie vier Dinge
- Benutzername
- Passwort
- Namen des Mailservers
- Signaturtext
Daten zur Hand? Dann kann es losgehen.
[/av_textblock]
[/av_two_third]
[av_content_slider heading=“ columns=’1′ animation=’slide‘ navigation=’arrows‘ autoplay=’false‘ interval=’5′ font_color=“ color=“ av_uid=’av-6czsn6q‘]
[av_content_slide title=’Outlook starten und die Einrichtung beginnen‘ link=“ linktarget=“ av_uid=’av-5ywlgxu‘]
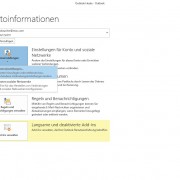
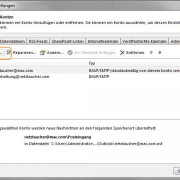
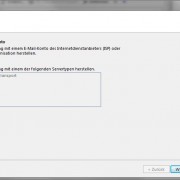
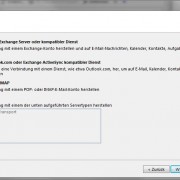
Outlook öffnen » oben links Datei » rechts Kontoeinstellungen öffnet die Einrichtungsroutine. Über Neu » E-Mail-Konto » POP oder IMAP geht es weiter.
[/av_content_slide]
[av_content_slide title=’Abfrage der Zugangsdaten und Namen des Mailservers‘ link=“ linktarget=“ av_uid=’av-5dom1he‘]
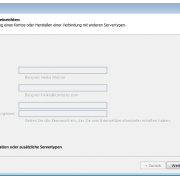
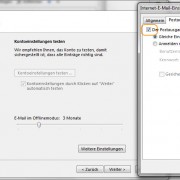
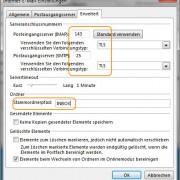
Wählen Sie manuelle Konfiguration und geben die Daten ein. Wichtig ist hier die Übergabe der Einstellungen für den Postausgang in den erweiterten Einstellungen.
[/av_content_slide]
[av_content_slide title=’Test der Einstellungen, Speichern.‘ link=“ linktarget=“ av_uid=’av-51nprj6′]
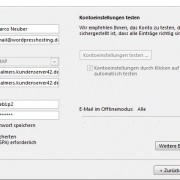
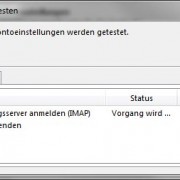
Im letzten Schritt überprüft Outlook die Daten und bieten Ihnen die Speicherung an. Legen Sie zum Schluss eine Mailsignatur an. Hier zur Erklärung
[/av_content_slide]
[/av_content_slider]
[av_hr class=’default‘ height=’50‘ shadow=’no-shadow‘ position=’center‘ custom_border=’av-border-thin‘ custom_width=’50px‘ custom_border_color=“ custom_margin_top=’30px‘ custom_margin_bottom=’30px‘ icon_select=’yes‘ custom_icon_color=“ icon=’ue808′ av_uid=’av-4cvjpj6′]
[av_one_third first av_uid=’av-ecumte‘]
[av_image src=’https://netztaucher.com/wp-content/uploads/2015/01/apple-mail.jpg‘ attachment=’11090′ attachment_size=’full‘ align=’center‘ animation=’no-animation‘ link=“ target=“ styling=“ caption=“ font_size=“ appearance=“ av_uid=’av-3j2mg9u‘][/av_image]
[/av_one_third]
[av_two_third min_height=“ vertical_alignment=“ space=“ custom_margin=“ margin=’0px‘ padding=’0px‘ border=“ border_color=“ radius=’0px‘ background_color=“ src=“ background_position=’top left‘ background_repeat=’no-repeat‘ av_uid=’av-2t52rqa‘]
[av_textblock size=“ font_color=“ color=“ av_uid=’av-2n1boci‘]
Apple Mail
Zur Einrichtung Ihres Mailaccounts benötigen Sie vier Dinge
- Benutzername
- Passwort
- Namen des Mailservers
- Signaturtext
Daten zur Hand? Dann kann es losgehen.
[/av_textblock]
[/av_two_third]
[av_content_slider heading=“ columns=’1′ animation=’slide‘ navigation=’arrows‘ autoplay=’false‘ interval=’5′ font_color=“ color=“ av_uid=’av-28ab5wi‘]
[av_content_slide title=’Mail starten und die Einrichtung beginnen‘ link=“ linktarget=“ av_uid=’av-1qenfsy‘]
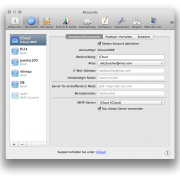
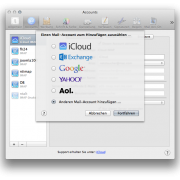
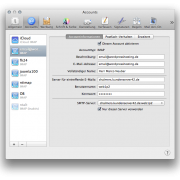
Beim 1. Start fragt Mail direkt nach Zugangsdaten. Sonst über die Einstellungen (⌘ ,) Accounts unten links auf + den Dialog aufrufen. Jetzt anderen Mailaccount hinzufügen wählen und die Daten eingeben.
[/av_content_slide]
[av_content_slide title=’Abfrage der Zugangsdaten und Namen des Mailservers‘ link=“ linktarget=“ av_uid=’av-zuha9u‘]
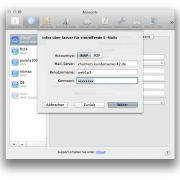
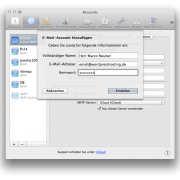
IMAP auswählen, Servername, Benutzername und Passwort eingeben. Weiter.
[/av_content_slide]
[av_content_slide title=’Test der Einstellungen, Speichern.‘ link=“ linktarget=“ av_uid=’av-rxy89u‘]
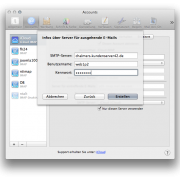
Nach der Eingabe der Zugangsdaten für den Versand (SMTP) bekommen Sie eine Zusammenfassung angezeigt.
[/av_content_slide]
[/av_content_slider]
[av_textblock size=“ font_color=“ color=“ av-medium-font-size=“ av-small-font-size=“ av-mini-font-size=“ av_uid=’av-jwrtfuht‘ admin_preview_bg=“]
[xyz-ips snippet=“meta“]
[/av_textblock]


Schreiben Sie einen Kommentar